First Steps: Make Your Connections
- Connect a monitor to your recorder using the included HDMI cable.
- Connect the included mouse to the USB ports on the front or back of the recorder.
- Connect your recorder to the internet using the provided ethernet cable.
- Connect the included power cord to the recorder and plug the other end into a standard household outlet.
Helpful Documents:
Next Steps: Powering on and Account Creation
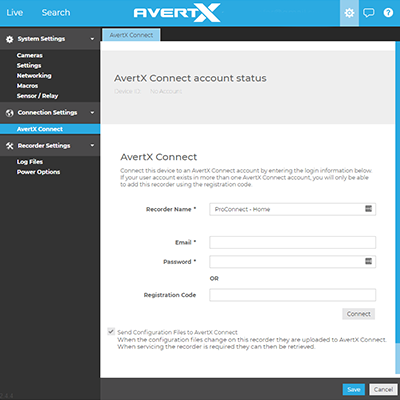
Once your system is connected, take the time to connect your system to AvertX Connect for remote access as well as set the default camera passwords for enhanced cyber-security.
- Create an AvertX Connect account at connect.avertx.com/register
- Power on the and log in to the recorder using the default credentials.
Default Credentials:
Username: admin
Password: 1234 - Follow the First Time Wizard to complete basic setup of your recorder.
- Add your recorder to your AvertX Connect account. For detailed instructions, read this FAQ.
- Set the default camera password. For detailed instructions, read this FAQ.
- Connect the cameras to the PoE IP Camera Connections using the included 100' camera cables. AvertX recommends connecting all cameras and cables before installation to confirm operation. For more information, please consult our Installation Planning Guide
Related Links:
Remote Use
Your recorder is optimized for remote use. You can access all functions and settings remotely through a web browser, enabling you to place your recorder wherever it is secure and convenient without the need to be connected to a monitor. Connecting to your recorder with a web browser will provide the most powerful and feature-rich experience.
Additional features of web browser interface:
- Digital Zoom
- PTZ (Pan, Tilt, Zoom) Controls
- Thumbnail Search
- Timeline Search
- Event Search


