How to do a ProConnect Clean OS system recovery
When doing a Clean OS Install for a ProConnect System Recovery all settings will be lost, but video data remains unaffected.
Note: If you would like to restore your settings (i.e. camera names and passwords) after the reimage, ensure you have a recent NVR configuration file downloaded.
- Refer to this article to create a bootable USB system recovery drive for the ProConnect software.
- Insert the USB recovery flash drive into a USB 3.0 (blue) port on the unit.
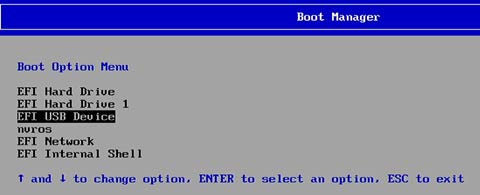
- At the start of the reboot press F12 (ProConnect NVR) or Esc key (ProConnect Summit NVR) to load the boot menu and select UEFI USB recovery flash drive and hit enter.

- The recovery wizard for ProConnect will load.
- Select Clean OS Install.
- Accept License Agreement and continue.
- You will need to type your recorder's serial number, located on the side of your unit. NOTE: The serial number must be entered in all UPPERCASE characters to be accepted.
- After it's done upgrading, click Finish and wait for it to reboot before pulling out the USB drive.
- When complete, consult the Quick Start Guide for your Recorder for instructions on initial system setup.
- If you would like to restore network access and previous settings, follow these instructions to restore access to the NVR.


