How to Create and Use Schedules on a ProConnect
Schedules are used to control the time-frame Macros can and cannot be triggered for motion or analytic alerts. Using custom schedules in the setup of Macros will define whether you receive the alerts at night, over the weekends, or only certain days of the week.
To access the Schedule creation menu enter the setup menu as admin. Then click on 'Macros'. There will be three tabs labeled 'Macros', 'Schedules', and 'Holidays'. Select Schedules.
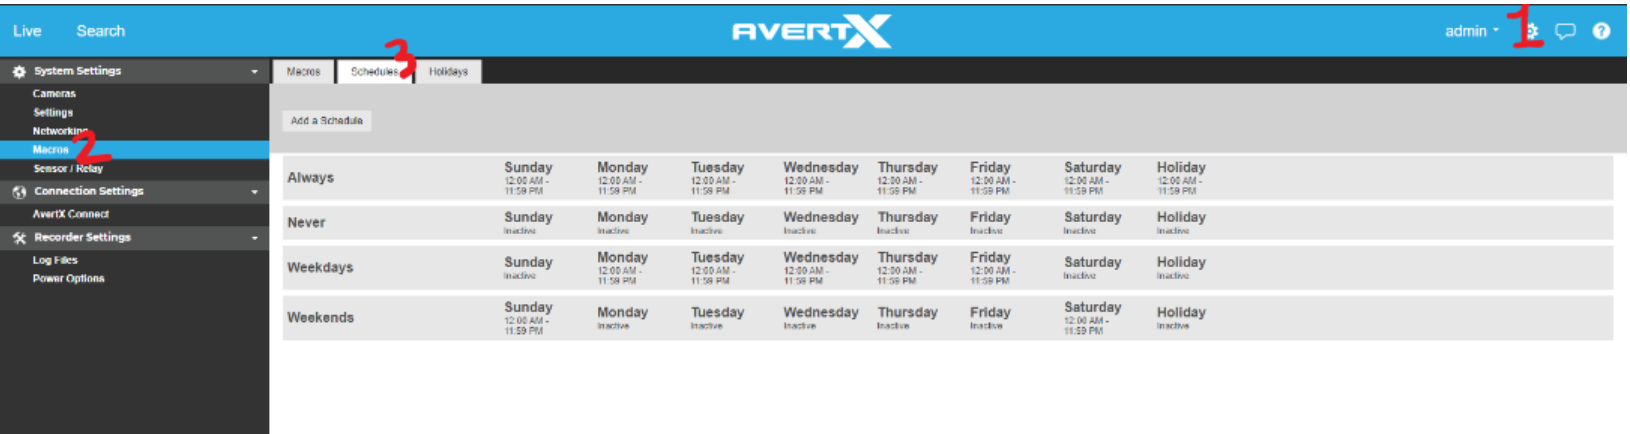
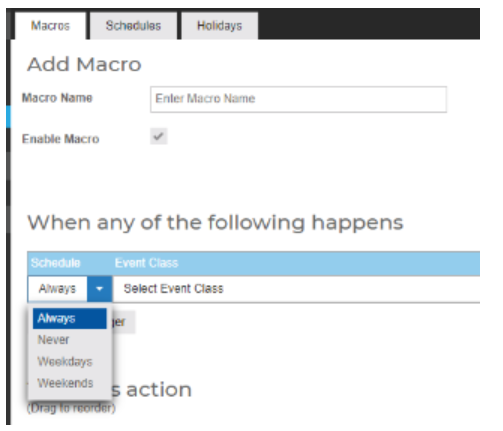
There are 4 default schedules which you can use to create Macros, however to create a custom schedule select 'Add a Schedule'
Clicking on 'Add a Schedule' will open this menu.
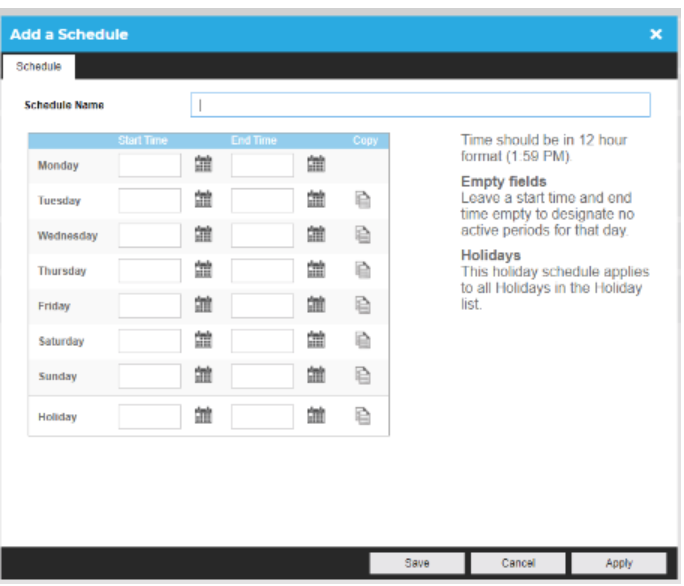
For Start Time and End Time, you will define a start and end time within the 24 hour period of that particular day of the week.
note: Because of this, if you wish to set up a schedule that runs overnight from a certain PM hour to a certain AM hour the following day, it will be set up in two schedules. One schedule for the start time until midnight, and the second schedule for midnight to the end time.
For example. A schedule set up for 7 PM until 5:30 AM would be set up with 7 PM until 11:59 PM as one schedule, with 12:00 AM until 5:00 AM as the second schedule.

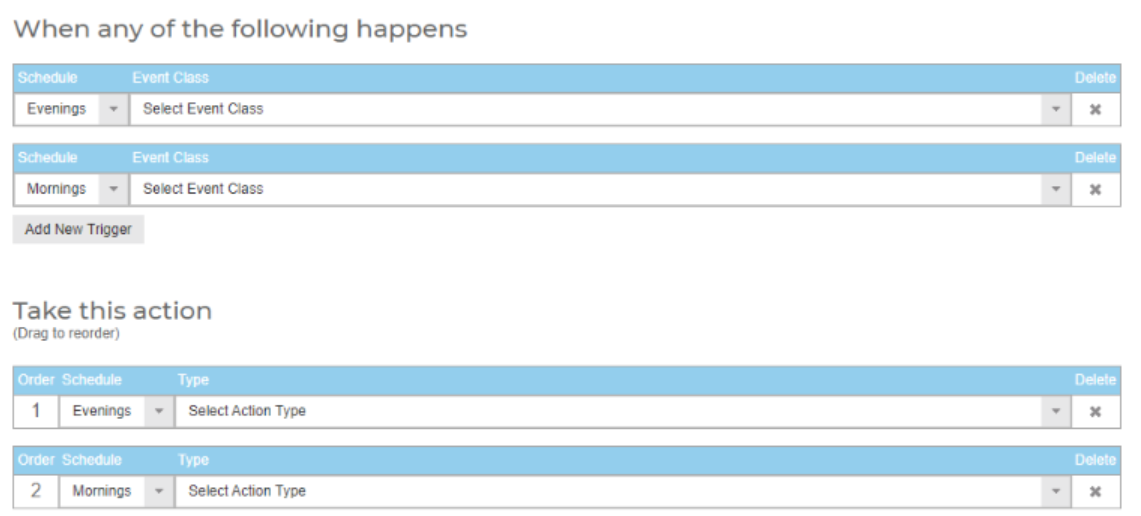
Once a schedule is created, it will show up in the 'Schedule' drop-down for the setup of Macros.
The same schedules can be used in both the Trigger and the Action drop-down menus, as shown below, to control when a certain action is taken or when the system triggers that particular action.